Explore the Blog

MORE ABOUT me
a homeschooling mom of four who used to blog about food, has a book about sourdough, and who is now walking through the grief of losing my dad.
Hi, I'm Kels!

The Best Sourdough Glazed Donuts

Pie Crust Natural Yeast, Sourdough

I know, I know, I should have posted this a week earlier to get it to you for Thanksgiving. However, I was still doing whole30 last week when I made this recipe so I couldn’t taste it personally. I didn’t want to post something that I hadn’t tested out myself first, and I like to make a recipe 3 times to make sure the measurements stand up each time. I made this recipe a total of 5 times over the past week and got to finally taste it over the weekend. It wins. All the things.
If you don’t tell anyone, they won’t know that this is a natural yeast pie crust. It turned out both flaky and chewy, if that’s even possible! I have to say, I am pretty proud of this recipe.
Sometimes things just click, and a recipe comes together. That’s what happened for me here and I couldn’t be more thrilled. Pie is one of my favorite desserts. I love it for breakfast, lunch, and dinner, but don’t hardly ever eat it. That’s probably why I love it so much  — it’s a novelty. I used to loathe making pies, but have grown to really enjoy it. There is something extra special about putting all of that work into a pie that turns out just right.

With this recipe I can enjoy my pies and know that they won’t cause me discomfort and are even packing a nice little probiotic punch, as well as the other benefits of using natural yeast. Sure, the sugary fillings aren’t great, but it balances out, right? Right.

Ingredients

  • 2 c all purpose unbleached flour or pastry flour
  • 2 T organic cane sugar
  • 1 tsp salt
  • 1 c total COLD fat — lard, butter, or a mixture of
  • both — cut into 1/2” chunks   ** I have tried all butter,  ¾ c lard + ¼ butter, and  all lard. I liked the lard/ butter mixture the best,  but all were yummy!
  • 1/4 c + 1-2 T starter
dutch oven sourdough bread

Step by Step Instructions

Step 1

In a medium sized mixing bowl, combine flour, sugar, and salt.

Step 2

Using a pastry blender, cut in the fat until it resembles a coarse meal, with little chunks of fat distributed throughout.

Step 3

Add 1/4 c starter and mix well with your hands until incorporated. Depending on the hydration of your starter, you will need to add a little more until the dough forms a ball.

Step 4

Separate the dough into two equal parts and flatten into discs. Wrap in plastic wrap and place in the fridge for 3-6 hours.

Step 5

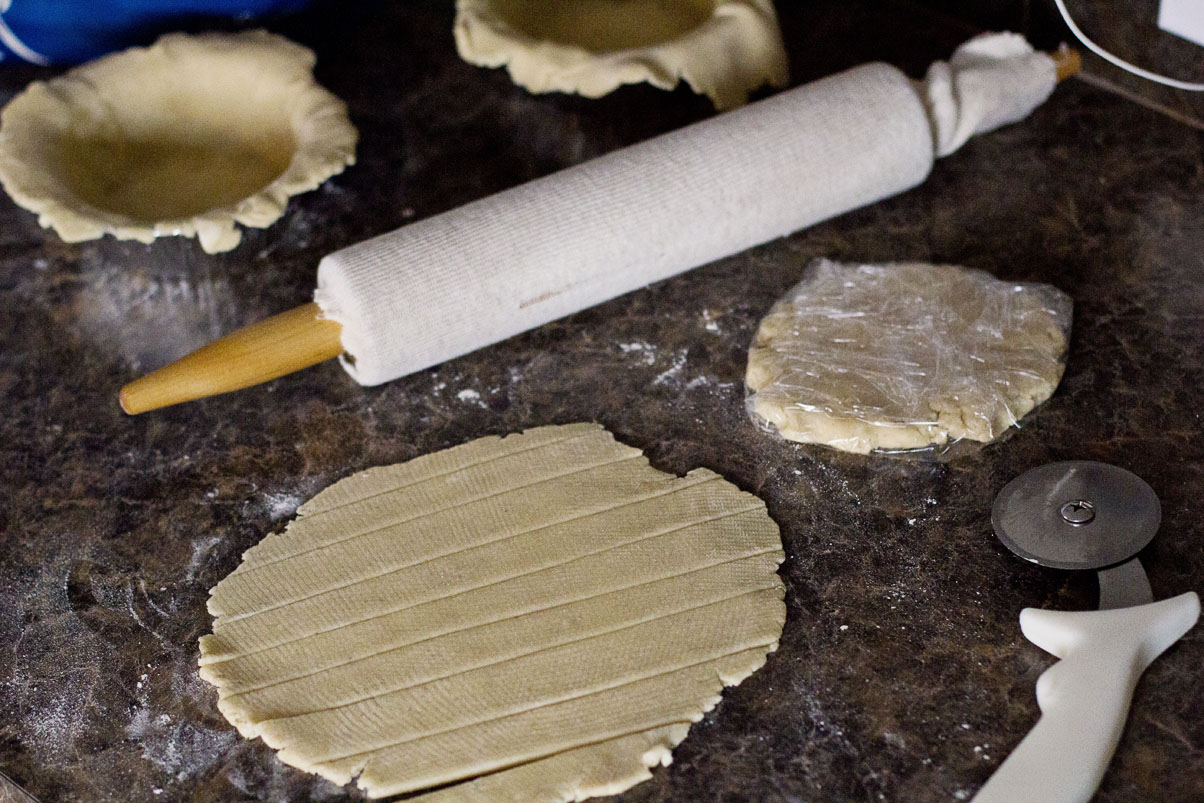
When ready to make your pie, remove the dough and roll out with a rolling pin. I recently purchased a rolling pin cover and it transformed my pie making this year. I also really loved rolling them out on my silicon baking mat, it made transferring them a lot easier!

Step 6
For a one crust pie, place the rolled out crust into your pie tin, pressing it down lightly and trimming the edges. Prick with a fork liberally to allow steam to escape while baking, or you will have a puffed up crust!
Step 7

Bake at 400 degrees for 10-12 minutes or until slightly browned. Cool and fill as desired.

Step 8
For a two crust pie, place your crust in your pie pan and press down gently. Fill with desired filling and roll out your second disc of dough for the top. Trim the edges and cut vents for the steam to escape during baking. Bake according to your fruit (or other)
pie recipe.
Makes 1 double crusted (9”) pie or 2 single crusted pies

Comments +

Reply...

about me

Hey, I'm Kels!

a homeschooling mom of four who used to blog about food, has a book about sourdough, and who is now walking through the grief of losing my dad.

I have lots of recipes and resources, but now it's just about me being real, walking through the messy and beautiful parts of life.

FREE DOWNLOAD

How to Make Your Own Sourdough Starter

I am so excited to take you, step by step, through the process of making your own sourdough starter. It might seem a little intimidating at first, but if you stick with it, your time and patience will be rewarded with a lifetime of sourdough goodies!

Pin It on Pinterest

Share This