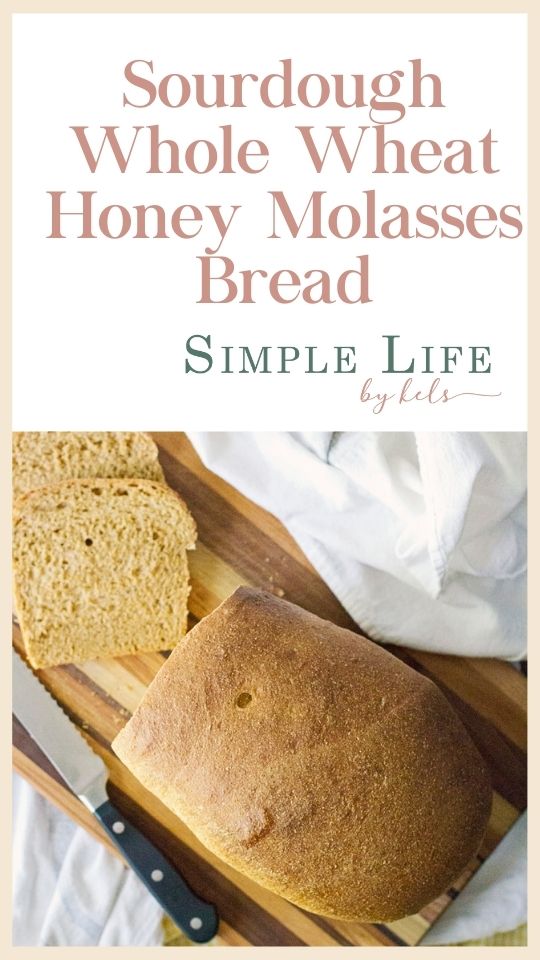
Sourdough Whole Wheat Honey Molasses Bread
Ingredients
- 1 c active sourdough starter
- 2 c water
- 2 tsp salt
- 1 egg
- 1/4 c honey
- 1/4 c molasses
- 1/4 c avocado or olive oil
- 1 tsp apple cider vinegar
- 6-7 c flour
Step by Step Instructions
Step 1
In your stand mixer combine: starter, water, salt, egg, honey, molasses, oil, and vinegar. While mixing on low speed add your flour, 1 cup at a time, until the dough resembles a shaggy mass (about 5 c of flour).
Step 2
Turn off the mixer and let it sit for 20-30 minutes. This allows the flour to soak up liquid so that you don’t add too much flour, resulting in a denser loaf.
Step 3
Step 4
Step 5
Remove the dough into a greased bowl and cover with a lid or greased plastic wrap.
Step 6
Step 7
After the dough has doubled in size, turn it out onto a lightly greased surface (I use a little bit of water on my counter top). Cut into two pieces. Grease 2 loaf pans.
Step 8
Shape dough into a basic sandwich loaf.
Step 9
Spread each piece of dough into a flat rectangle.
Step 10
Fold ⅓ of the dough over into the middle.
Step 11
Fold the other ⅓ on top of the first.
Step 12
Pinch ends and sides together.
Step 13
Place loaves into greased pans.
Step 14
Cover and let rise another 2- 2½ hours or until above the edge of the pan..
Step 15
Preheat oven to 350 degrees. Bake bread for 35 min- utes or until a thermometer inserted into the bottom of the loaf reads 180 degrees.


Question. When you make this bread, when do you start? That’s a lot of proof time (almost 15 hours total) so do you always start bread at night and leave it overnight then bake in the morning? That’s the only way I can figure to do it . . .
Excellent question. I do two things:
1. I mix up my dough in the evening, shape in the morning and then rise again (2 hrs) and bake
OR
2. I mix up the dough in the morning (before 9, typically) and let rise all day, then shape in the early evening (5 or 6 p.m.), rise again (2 hrs), and bake.
The long rise needs to be AT LEAST 6 hours. So that leaves enough time during the day, if the dough is kept warm enough. I put it in my oven with the light on and it’s the best place for it in my house because it’s warm. As long as it’s rising up well after 6 hours, you can shape and do the second rise.
Hope that helps!
Beautiful loaves! Dumb question time though. You don’t indicate what type of flour you used. I’m assuming you’re using whole wheat vs. bread flour just from your title but I want to make sure before I start. I love your loaf pans! I saw some cast iron pie pans a couple of months ago and now I’m kicking myself for not buying them!
Sorry! Yes, I use whole wheat. You can use whole wheat bread flour too! Those cast iron pans really are great, don’t pass them up next time!
Do you use Hard Red wheat or Hard white wheat? What wheat do you use in your starter?
I use hard white for my starter and for my bread most of the time. But always for my starter, because that’s what I use the most and have the most of. Hard red has such a distinct flavor, I like the more subtle flavor of the white.
Have you ever doubled or tripled this recipe before?
Yes I double it all the time!
Thank you!
Just wanted to let you know that my family LOVES this bread! My husband requests it weekly! And everyone I share it with. Thank you so much for sharing!!
This makes me SO happy, thanks for letting me know!!!
What size of pans are these?
they are the lodge cast iron bread pans, they only come in one size i think. they are 10x5x2.75 ish.
Do you think the egg could be omitted? I have an adult onset egg allergy and baking is really throwing me for a loop. I purchased your starter recently and once it’s active and healthy I can’t wait to try a recipe. Alternatively, is there a way to turn my current bread recipe into a sourdough?
you can try using flax or chia eggs in its place? you can easily convert your own recipes by subbing 1/4 c of natural yeast for every LOAF (typically) so if your recipe makes 2 loaves, use 1/2 c of starter instead of the yeast.